
There are plenty of techniques for drawing faces with ideal proportions. Some of them are based on the shape of a circle, others divide the face into three parts, others into five. I’ve tried almost all of them, but most of the time, something went wrong. Did you have that problem too? Nice, but not perfect.
Until now…
Who is this Andrew Loomis and what does he have to do with my portraits?
I accidentally heard about the Loomis method and did what anyone in my position would do…I googled him! BINGO! The method is simple and for me, a self-taught artist, it shows all the points of the face with pharmacy precision. I believe he has his flaws and his detractors, but for me Andrew Loomis was a genius!
He lived in the first half of the 20th century in America and long after his death his realistic style of drawing influenced subsequent generations. And it had an effect on me too.
So, with the same pharmacy accuracy as Loomis did, I will try to present this method in the next two articles.
Face in front using the Loomis method in seven stages
Let’s go straight to how to apply the Loomis method in drawing a portrait from the front. All you need is a pencil, an eraser and a ruler.
Step 1:
Draw a rectangle that will mark the boundaries of the face. It should be 33% higher than its width. Remember, we’re talking about a standard face. In fact, faces have different shapes and sizes.
Divide the rectangle in half with a vertical line. This will mark the center of the face. Then draw two horizontal lines evenly spaced so that there are 6 squares with equal sides.
This way, the top two squares mark the forehead, the middle two the eyes and nose, and the bottom two the mouth and chin. The ears will be in the center section, but outside of the entire structure.

Step 2:
Now divide the segments in the middle and bottom of the main rectangle with vertical lines in half. Then draw three horizontal lines evenly spaced in each square. This will make 24 small squares instead of the bottom four. The upper section of the face remains unchanged.

Step 3:
Take care of the upper section. Draw an arch starting in the middle of the left side of the upper left square, rising up so that its highest point is slightly above the structure, then down to the middle of the right side of the upper right square. This is how you got the top line of the head.
Draw the ear all the way up the center section, but outside the structure.
To find the eyebrow line, draw an arc starting at the lower left corner of the upper left rectangle of the center section and ending at the lower right corner of the upper right rectangle Complicated? Look at the drawing!

Step 4:
Draw a nose. Two vertical lines that run through the middle of the inner rectangles of the middle sector will help you with this. They determine the width of the nose at the base. Then draw a small circle at the intersection of the lower horizontal line of the center sector and the vertical line dividing the center sector in half. This will be the tip of the nose. Now all that’s left to do is draw the nose holes and it’s almost done!

Step 5:
Eyes. We start by sketching a small circle at the intersection of the top horizontal center line of the section and the vertical line dividing the left square of the center section in half. The diameter of the circle should be 1/6 of the width of the left square of the middle section, e.g. if the width of the entire face is 12 cm, the left square will be 6 cm wide, so the circle will be 1 cm in diameter. This will be the pupil of the left eye. We do the same in the right square, creating the pupil of the right eye.
The width of the entire eye is three times the width of the pupil. Using this as a measure, draw two lines on either side of the pupil for the other two-thirds. (see drawing “Step 5”)
Now draw two arcs connecting these lines, one above the eye and the other below. Remember that the upper arch will be more curved than the lower one.

Step 6:
Now go to the lower sector. We assume that the horizontal line dividing this sector in half is the middle of the mouth. And now concentrate! The middle, upper two rectangles of the lower sector divide horizontal lines into three parts, and the two squares below divide the horizontal line into two parts. On the basis of this grid, you can determine the line of the mouth. The top lip should fit in the bottom of the first rectangle, and the bottom lip should fit in the top half of the middle rectangle of the bottom section.
I know it may seem complicated, but I still encourage you to look at the drawing. In this case ‘Step 6’
You define the chin by drawing a small arc in the middle, extending slightly beyond the entire structure, just below the lower section.

Step 7:
Turn to the jawline of the face. Start by sketching a light guide line from a point just below the middle of the middle section. The line should run diagonally down to ¾ of the length of the lowest line of the left square of the bottom section. Based on this, draw a slightly arched outline of the jawbone, then connect this arch to the chin line. Repeat on the other side of the face.
Now apply the tracing paper and trace the outline of the face without the grid lines.
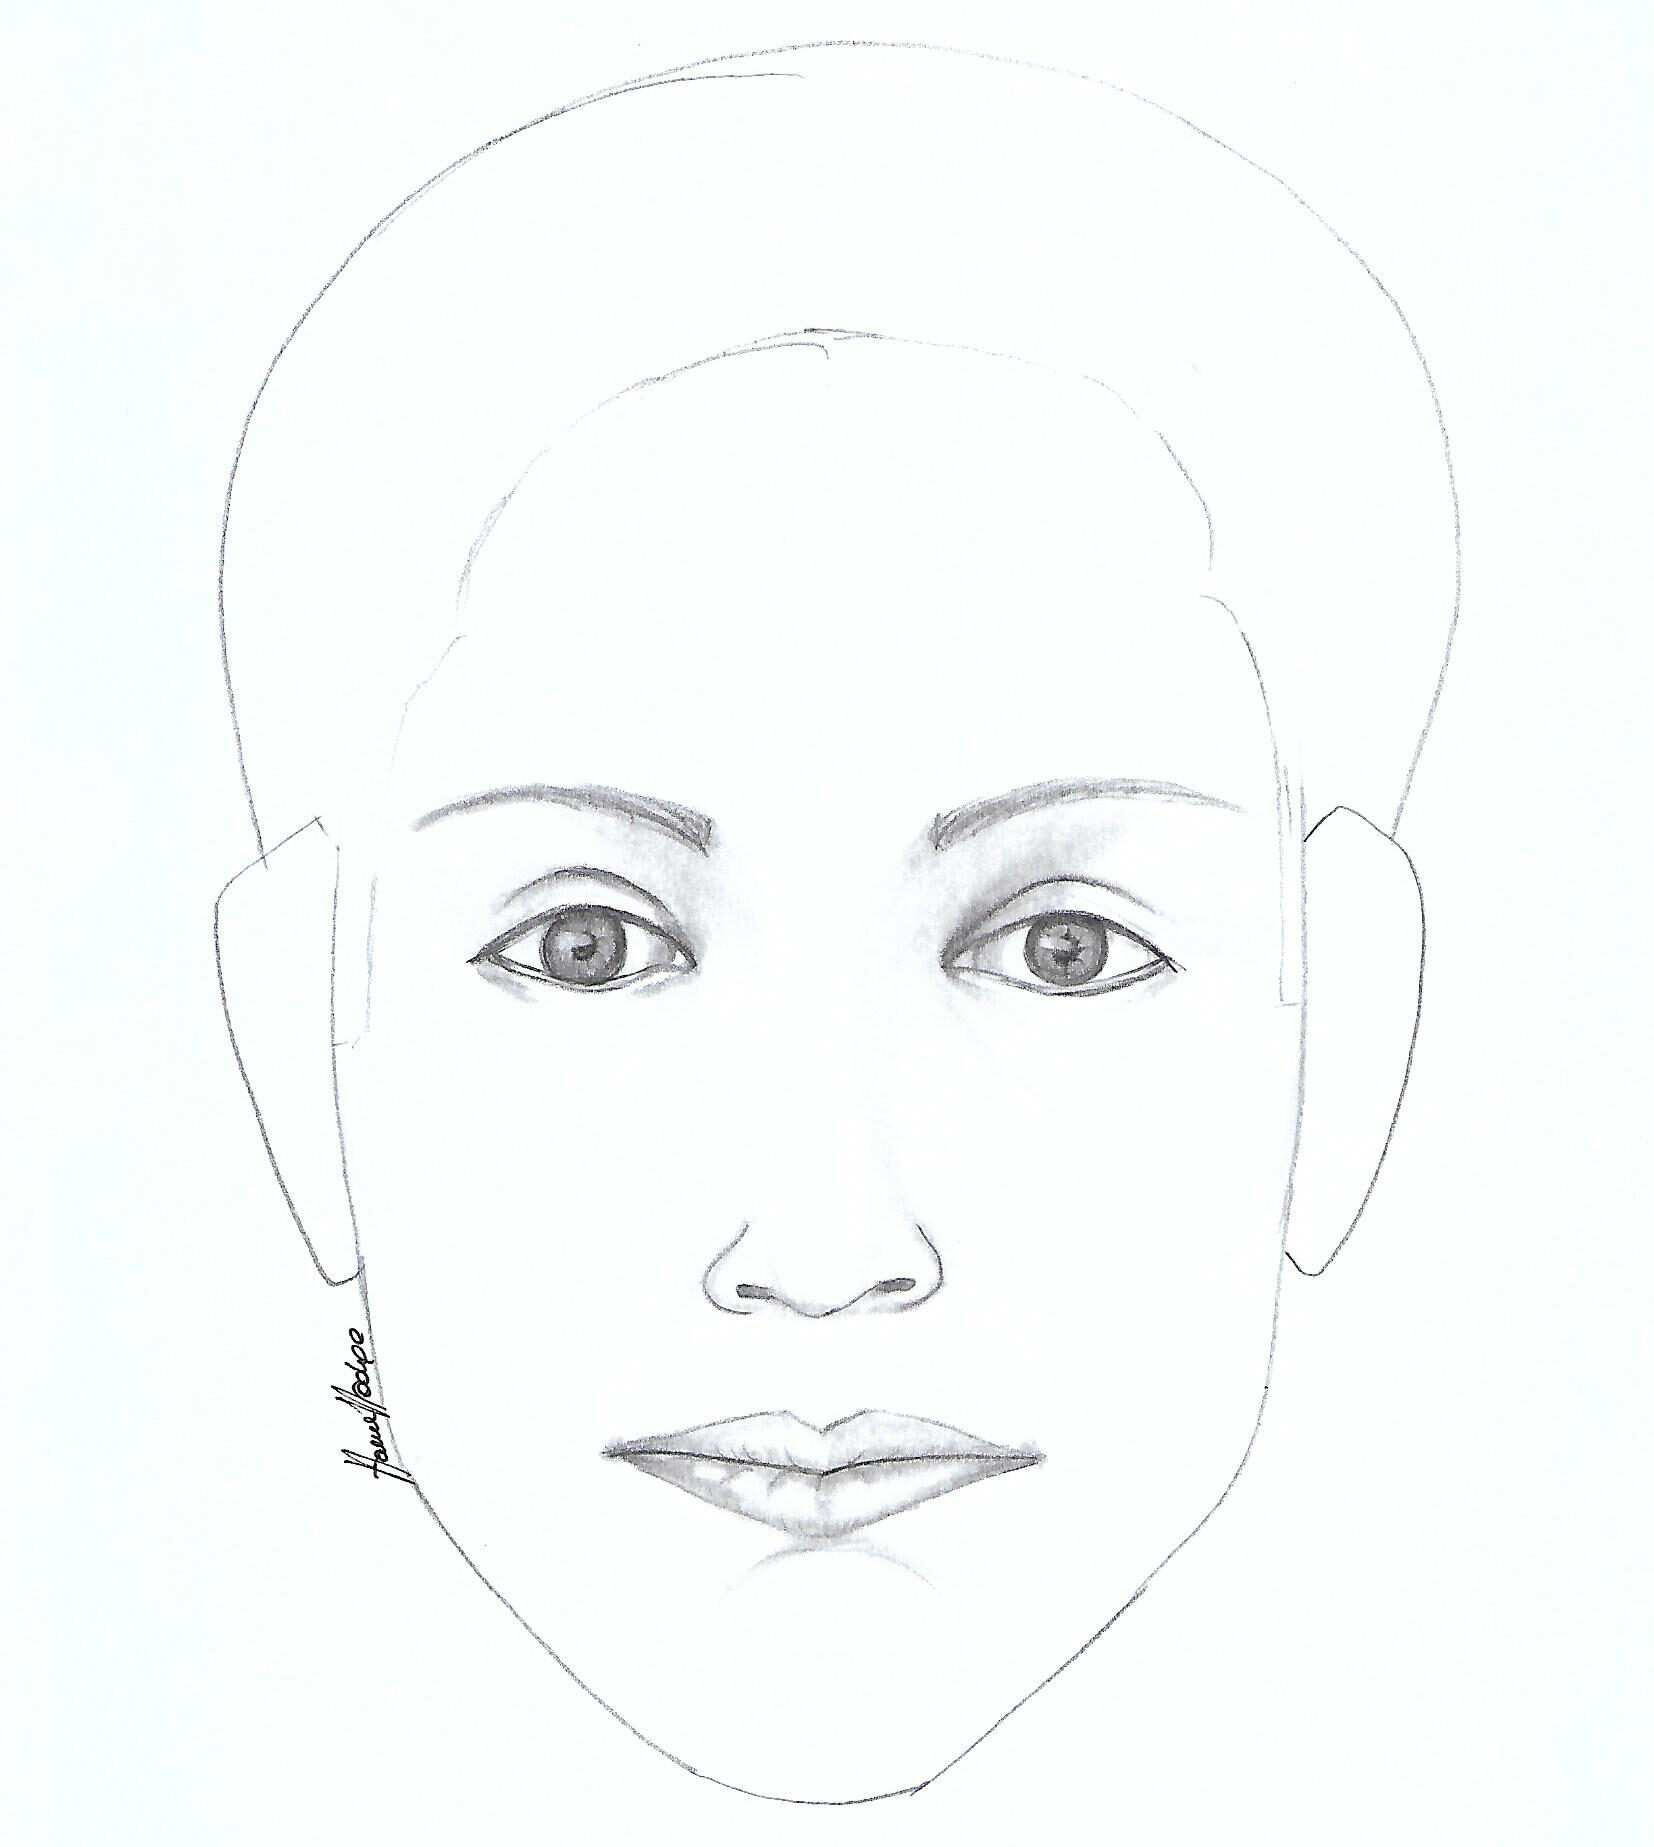
And done! Look what perfect portrait you’ve drawn! You can be proud of yourself!

A little bonus at the end!
To check exactly if everything is symmetrical, I’ll tell you a little trick.
Take a picture of the final drawing. Try not to be at an angle. If you have photo edits on your phone, look for the option to flip the photo vertically 180 degrees there. When you flip the photo, you will see all the bumps and errors!
In the attached picture, pay attention to the wings of the nose, eyebrows and mouth, which also need correction. You won’t see it with the naked eye in the original drawing.
Or maybe you’ll find more mistakes on my picture?
Have fun!

Click the button below to download the files

